Features and instructions

SUST Sociology Alumni Membership Management System

Detailed operating documentation for the public website, become-a-member registration, admin review, accounts, member portal, Chat, and Smritir Pata workflows.

Introduction

What this system does

The system is the official online platform for Sociology Alumni Association of SUST. It brings together public website content, member registration, admin approval, member services, communication, and accounts.

1Public Website

Visitors can read association information, view events, browse the member directory, open Smritir Pata, see the gallery, register as a member, and log in after approval.

2Admin Portal

Admin users review applications, approve members, manage member records, update website content, configure forms and membership types, and moderate submitted content.

3Member Portal

Approved members use their dashboard for profile, registration data, membership status, ID card, payment history, notices, notifications, Chat, and Smritir Pata articles.

This guide was prepared from the live public website screens and the local application modules. Field names in the registration form can be changed by admins through the Forms area, so use the live form as the final reference during actual registration.

Images and screenshots

Live page references

These screenshots are saved with the document in the docs-assets folder and are used to show the real public flow.
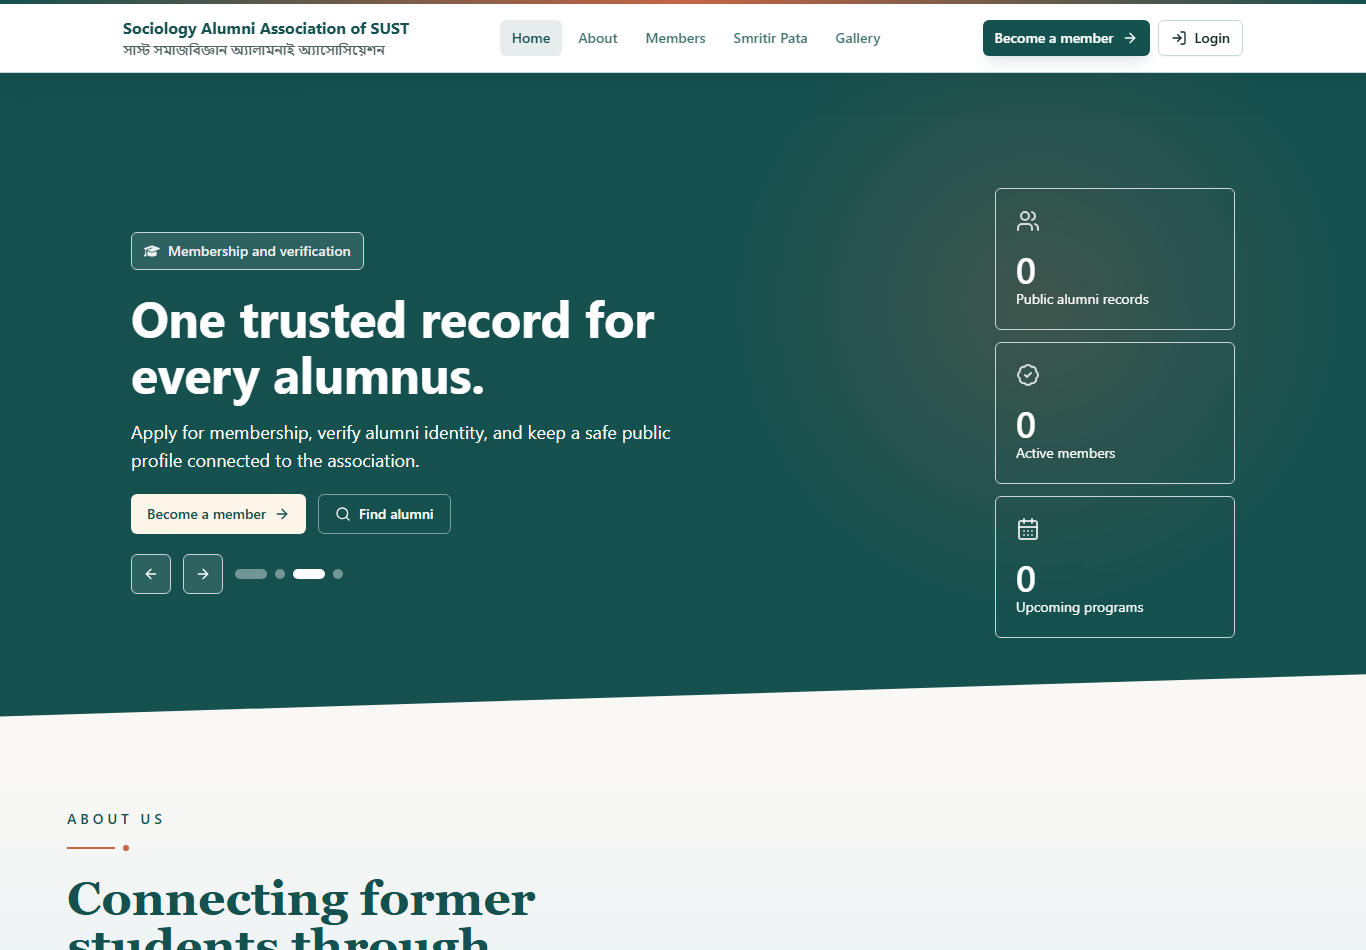
Live homepage screenshot
Homepage with navigation, Become a member, Find alumni, public events, gallery, and footer services.
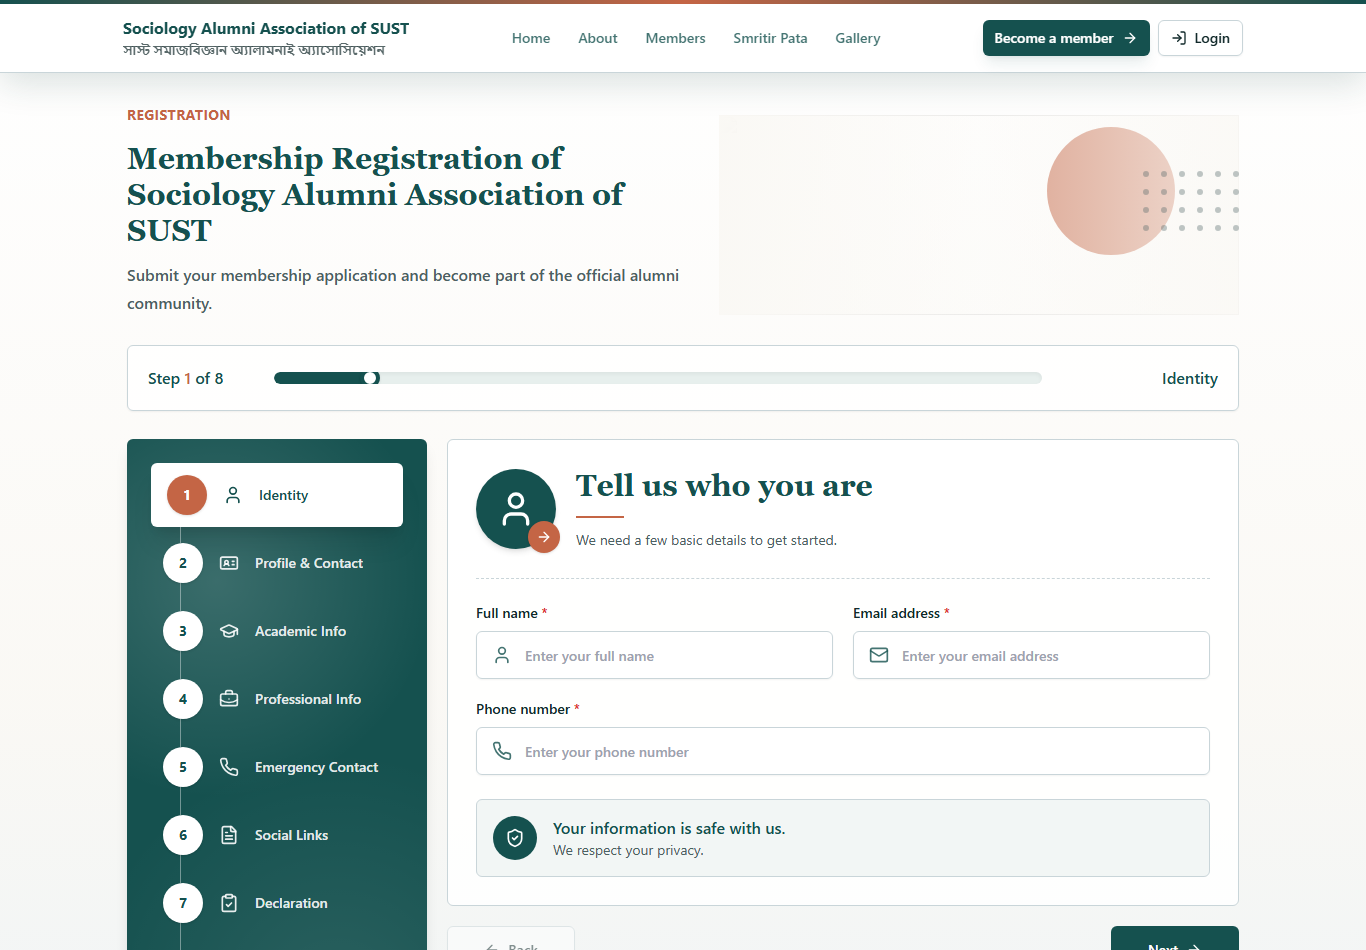
Live become a member screenshot
Become a member wizard showing the Identity step and the left-side step list.
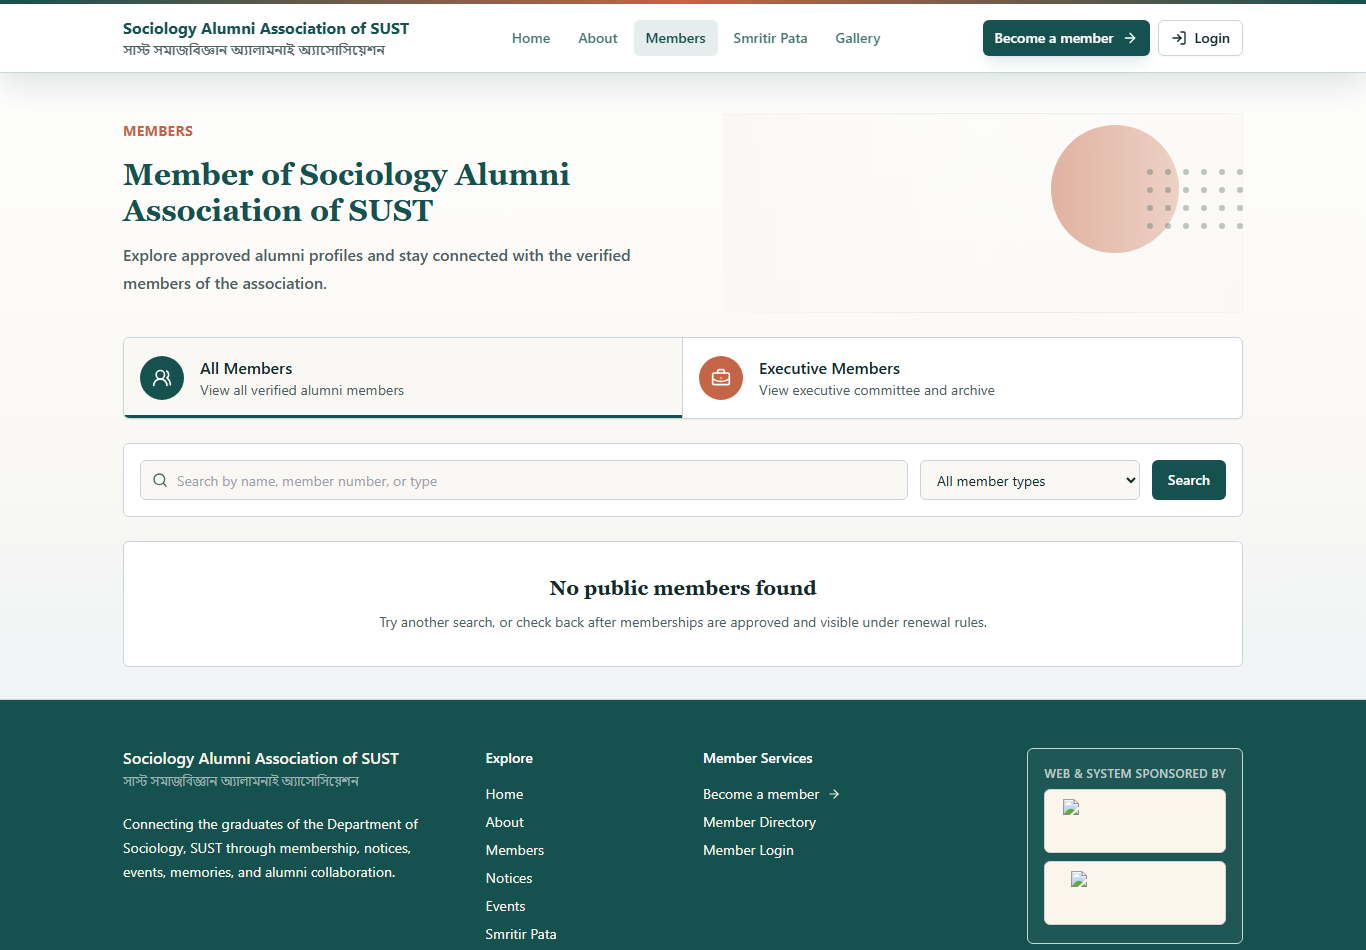
Live member directory screenshot
Member Directory with All Members, Executive Members, member type filter, and search.
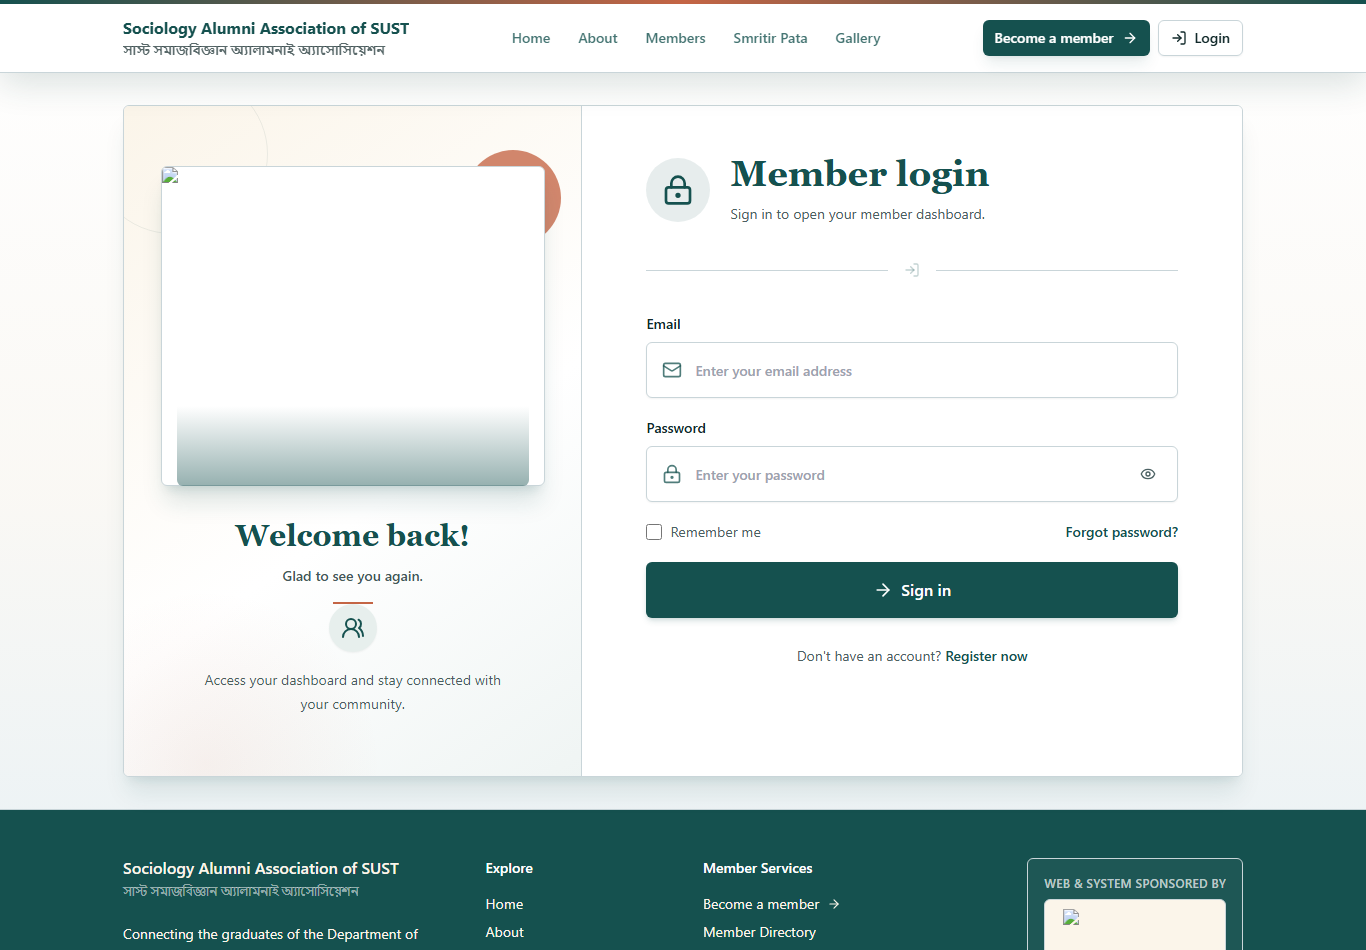
Live member login screenshot
Member Login page with email, password, remember me, forgot password, and register link.

Sponsor and developed by

Web and system credits

The live system footer lists the web and system sponsors, along with the development partner credit.


Tech Plus

Developed by Tech Plus

Development partner for the web and membership management system.

Visit developer website

Features

Complete feature list

The following modules are available across the public website, admin dashboard, finance area, and member portal.

WWebsite Control

  • Homepage sections and public pages.
  • Notices, events, gallery, donation, and Smritir Pata.
  • Public member directory and profile pages.
  • Media uploads for images, videos, documents, and PDFs.

RRegistration

  • Public Become a member wizard.
  • Dynamic form sections and field validation.
  • Photo, document, and payment proof uploads.
  • Application success page and correction link workflow.

AApplication Review

  • Application list and applicant details.
  • Approve, reject, update status, or request correction.
  • Member ID and temporary password after approval.
  • Audit history for important changes.

MMember Management

  • Member search, filters, and profile details.
  • Membership type, renewal status, joined date, and expiry date.
  • Public visibility rules for approved alumni records.
  • Registration data connected to each member record.

FForms

  • Reusable form builder for registration and other forms.
  • Sections, field labels, options, required rules, and order.
  • Support for text, date, number, dropdown, checkbox, radio, image, and document fields.
  • Registration form values saved with member records.

CAccounts

  • Chart of Accounts, source accounts, income accounts, and expense accounts.
  • Opening balances, income entries, expense entries, and ledger transactions.
  • Pending payment review with proof links.
  • Reports with CSV and PDF export.

PMember Portal

  • Dashboard, profile, registration form, membership status, ID card, notices, and notifications.
  • Payment history for subscription, renewal, donation, registration fee, and other records.
  • Change password flow for temporary and normal passwords.
  • Social link editing for website, Facebook, Instagram, and LinkedIn.

TChat

  • Search approved members.
  • Start direct conversations.
  • Create group conversations with at least two selected members.
  • Send messages and attachments, and use appear offline.

SSmritir Pata

  • Members can write, save draft, preview, and submit articles for admin review.
  • Admins can preview, publish, request correction, reject, or trash posts.
  • Post statuses include draft, pending, correction, rejected, published, and trash.
  • Posts support media, excerpt, taxonomy, tags, comments, and revisions.

How to use - public applicant

Step by step: Become a member

This is the full registration path for a visitor who wants to become an approved alumni association member.

Become a member registration wizard screenshot
The registration wizard starts with Identity and then continues through profile, academic, professional, emergency, social, declaration, and payment information.

Open the registration page

Go to the public website and click Become a member. The page title is Membership Registration of Sociology Alumni Association of SUST.

Step 1: Identity

Enter Full name, Email address, and Phone number. These core fields are required before continuing.

Step 2: Profile and contact information

Upload a clear profile photo and complete date of birth, blood group, gender, present address, permanent address, and alternative phone when shown by the form.

Step 3: Academic information

Enter department, session, batch, registration number, graduation year, and highest degree according to the live form. Use official academic information.

Step 4: Professional information

Add occupation, organization, designation, and work address. If the applicant is not currently employed, use the most suitable information requested by the form.

Step 5: Emergency contact

Add emergency contact name, phone number, and relationship so the association has an alternate contact when needed.

Step 6: Social links

Add website, Facebook, Instagram, and LinkedIn links if available. These links can help complete the member profile and public card.

Step 7: Declaration

Read the declaration and check I agree. The declaration confirms that the submitted information is true and correct.

Step 8: Membership and manual payment

Select membership category, choose payment method, enter transaction or reference ID, and upload payment proof if required. Payment proof may be an image or PDF when the field is enabled.

Submit the application

Use Next or Continue to validate each step. On the final step, click Submit registration. The system validates required fields before accepting the request.

Check confirmation and email

After submission, the success page confirms that the application was received. The applicant should check the inbox and spam or junk folder for related messages.

Public users

Member Directory and login pages

Public visitors can find approved alumni records and approved members can open the member dashboard from the login page.

Use Member Directory

  1. Go to Members from the public navigation.
  2. Use All Members to view verified alumni members.
  3. Use Executive Members to view committee members and archive when available.
  4. Filter by member type such as Life Member or Regular Member.
  5. Use the search box to find a member by available public information.
  6. Open the member profile page if the record is visible.

Use Member Login

  1. Go to Login from the public navigation.
  2. Enter the approved member email address.
  3. Enter the password provided during approval or the password set later.
  4. Use Remember me only on a trusted device.
  5. Use Forgot password? when the password is lost.
  6. Click Sign in to open the member dashboard.

How to use - admin users

Admin portal instructions

Admin users manage the operational data of the association. Use role permissions to restrict finance, content, committee, and member-management actions to the correct people.

Log in to admin dashboard

Open the admin login page, enter admin credentials, and verify that the dashboard menu is visible.

Review new applications

Go to Applications, open a pending application, and compare identity, academic, contact, membership, and payment information before making a decision.

Approve an application

Approve only after required fields and documents are acceptable. Approval creates or activates the member account, assigns a member ID, and issues a temporary password when needed.

Request correction

Use correction when information is missing or unclear. Write a clear correction note and select the information that needs to be updated. The applicant submits corrections and returns to review.

Reject an application

Use reject only when the application cannot be accepted. Add a reason so the applicant and future admins understand the decision.

Manage member records

Go to Members, search or filter members, open a profile, review registration values, update membership type or status when policy allows, and keep notes accurate.

Admin menu areas

Menu Use it for
Dashboard Overview of current system activity and quick access.
Website Control Public pages, hero content, sections, gallery, media, and website modules.
Notices and Events Association announcements, programs, dates, venue, and public event details.
Smritir Pata Admin posts and member-submitted article review.
Members Approved and pending member records, profile data, status, and membership details.
Applications Registration review, approval, correction, and rejection.
Accounts Finance ledger, income, expenses, pending payments, chart of accounts, and reports.
Forms Registration form sections, fields, options, required rules, and ordering.
Types and Renewals Membership types, renewal requirements, subscription fee settings, and renewal fee settings.

Admin checklist before approval

  • Applicant name, email, and phone are correct.
  • Academic information confirms SUST Sociology alumni identity.
  • Photo and documents are readable.
  • Membership type and payment information match association rules.
  • Any correction notes from previous reviews are resolved.
  • Approval note or audit reason is clear.

How to use - accounts

Accounts and finance instructions

Accounts tracks money movement with source accounts, income accounts, expense accounts, payment approvals, ledger entries, and exportable reports.

Source Accounts

Typical source accounts include Cash, Bank, bKash, Nagad, Rocket, and Undeposited Funds.

  1. Open Accounts.
  2. Go to Chart of Accounts.
  3. Confirm active source accounts.
  4. Add or edit accounts only when the association needs a new source.

Opening Balance

  1. Open Accounts.
  2. Go to Opening Balance.
  3. Select the source account.
  4. Enter amount, date, reference, and note.
  5. Save the entry to establish starting balance.

Record Income

  1. Open the Income tab.
  2. Select the source account where money was received.
  3. Select income category such as subscription, renewal, registration fee, donation, sponsor, or other income.
  4. Enter amount, date, party or member, purpose, reference, and description.
  5. Save the income entry.

Record Expense

  1. Open the Expenses tab.
  2. Select the source account paid from.
  3. Select expense category such as regular, monthly, event, office, website, printing, bank charge, or miscellaneous expense.
  4. Enter amount, date, paid party, reference, and description.
  5. Save the expense entry.

Approve Pending Payments

  1. Open Pending Payments.
  2. Review member name, amount, purpose, note, date, and proof link.
  3. Select the receiving source account.
  4. Select the correct income account.
  5. Approve to post the payment to the ledger, or reject with a reason.

Reports and Exports

  1. Open Reports.
  2. Select the reporting date range.
  3. Review income, expense, monthly subscription, and ledger sections.
  4. Export CSV for spreadsheets or PDF for printable records.
Finance users should not approve a member payment until the proof and amount are checked. Approved payments become paid records and are posted to the finance ledger.

How to use - member users

Member portal instructions

Approved members use the member portal for profile management, membership status, registration form review, ID card, payment history, notices, notifications, Chat, and Smritir Pata.

First login after approval

  1. Open the public Login page.
  2. Enter the approved email and temporary password.
  3. If prompted, change the temporary password immediately.
  4. Use a strong password that only the member knows.
  5. After login, the member dashboard opens.

Dashboard

  1. Open Dashboard from the member menu.
  2. Review member ID, account status, joined date, membership type, renewal status, and due information.
  3. Use quick links for Profile, Registration Form, Membership, Payments, ID Card, and Notice.
  4. If a temporary password alert appears, open the password change page and complete it.

Profile and security

  1. Go to Profile.
  2. Review member ID, full name, username, email, phone, status, membership type, joined date, approval date, and expiry date.
  3. Edit social links for website, Facebook, Instagram, and LinkedIn.
  4. Open Change password to update account security.
  5. Save changes and confirm the success message.

View registration form

  1. Go to Registration Form.
  2. Review all submitted registration sections and fields.
  3. Use print or download when a copy is needed.
  4. Use Request Correction if the portal allows profile correction.
  5. Submit updated values and wait for admin review if correction editing is enabled.

Membership status

  1. Go to Membership.
  2. Check membership type, renewal required status, renewal fee, monthly subscription requirement, and due amount.
  3. Follow association instructions for renewal or subscription payment when due.
  4. Contact admin or finance if payment has been made but status is not updated.

Payment history

  1. Go to Payments.
  2. Review payment date, purpose, status, proof link, and amount.
  3. Use proof links to confirm uploaded or recorded documents.
  4. Pending payments will update after finance review.

ID Card

  1. Go to ID Card.
  2. Review the auto-generated card from approved member profile and registration data.
  3. Check name, member ID, phone, blood group, address, date of birth, QR code, and return notice when enabled.
  4. Print or save the card if needed.

Notices and notifications

  1. Go to Notice to read association notices.
  2. Go to Notifications to see member-specific alerts.
  3. Watch for registration correction, Smritir Pata correction, rejection, renewal, and account messages.
  4. Open linked items from notification messages when action is required.

Member service

Use Chat

Chat lets approved members communicate through direct conversations and group conversations. The page also supports attachment messages and an appear-offline presence control.

Open Chat

Go to the member dashboard and click Chat from the member menu.

Search for a member

Use the Search members field in the Members panel to find an approved member contact.

Start a direct conversation

Click a member contact. The system creates or opens the direct conversation and loads the message list.

Create a group conversation

Click the group button, enter a group name, select at least two members, and click Create group.

Send messages

Type the message in the composer and click send. The send button is enabled when text or an attachment is added.

Send attachments

Attach an allowed file, confirm the filename shown above the composer, and send. If the wrong file is selected, remove it before sending.

Appear offline

Turn on Appear offline when the member does not want to show active presence.

Member service

Manage Smritir Pata posts

Smritir Pata is the article and memory section. Members can submit writings, and admins review before public publication.

Open Smritir Pata

Go to the member portal and click Smritir Pata. The page shows the member's articles.

Create a new post

Click Add New, enter the title, permalink slug, and body content in the editor.

Add content details

Add excerpt, choose taxonomy, add tags, upload or insert media, choose whether comments are allowed, and use preview before submission.

Save as draft

Click Save Draft when the article is not ready for admin review.

Submit for review

Click Submit for Review. The status becomes pending and admin review is required before publication.

Edit existing post

Open the post from the article list and update the title, body, media, excerpt, taxonomy, or tags. If a correction was requested, read the admin note before resubmitting.

Trash, restore, or delete

Move unwanted posts to trash. In Trash, restore if needed or permanently delete when the post should be removed forever.

Forms and configuration

Update registration and reusable forms

The Become a member wizard is driven by form configuration. Admins should maintain fields carefully because the same data becomes part of member records and ID card/profile information.

Edit a form

  1. Go to admin Forms.
  2. Open the registration form or another form.
  3. Add or edit sections.
  4. Add fields with label, key, placeholder, type, required rule, options, help text, and sort order.
  5. Save changes and test the public form.

Recommended field rules

  • Keep field labels short and clear.
  • Use required fields only for information that is truly mandatory.
  • Use dropdown, radio, and checkbox fields when choices should be controlled.
  • Use image fields for photo uploads and document fields for PDF or proof files.
  • Do not change field keys after data has already been collected unless migration is planned.

Operating flow

Recommended daily workflow

Use this sequence to keep the system clean, applications moving, and finance records accurate.

Maintain website

Update public pages, notices, events, gallery, and visible content.

Check applications

Open Applications and review new registrations every working day.

Correct or approve

Request correction when incomplete, approve when verified, reject when invalid.

Review payments

Check proof and approve or reject pending payments from Accounts.

Post finance entries

Record manual income and expenses with correct accounts and references.

Support members

Help members with login, password, profile, ID card, notices, and membership status.

Moderate posts

Review Smritir Pata submissions and send clear correction or rejection notes.

Export reports

Export monthly or date-range finance reports for records and meetings.